
Introduction
In this guide, we’re going to provision a multi-node Kubernetes cluster using kubeadm and VirtualBox. This will include only one control plane node and two worker nodes, but you can scale it to more control and worker nodes as of your requirements.
Prerequisites
- At least 8GB RAM of RAM on your host machine
- 20GB free disk space
- Oracle VirtualBox
- Ubuntu 22.04 LTS Server ISO image
Architecture Overview
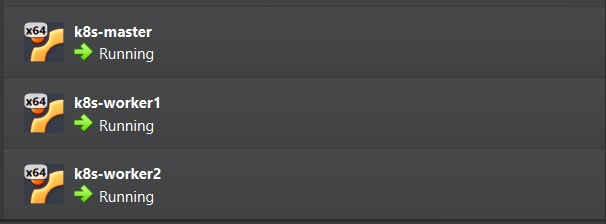
We need 3 virtual machines (VMs):
- k8s-master (Control pane node)
- k8s-worker1 (Worker node 1)
- k8s-worker2 (Worker node 2)
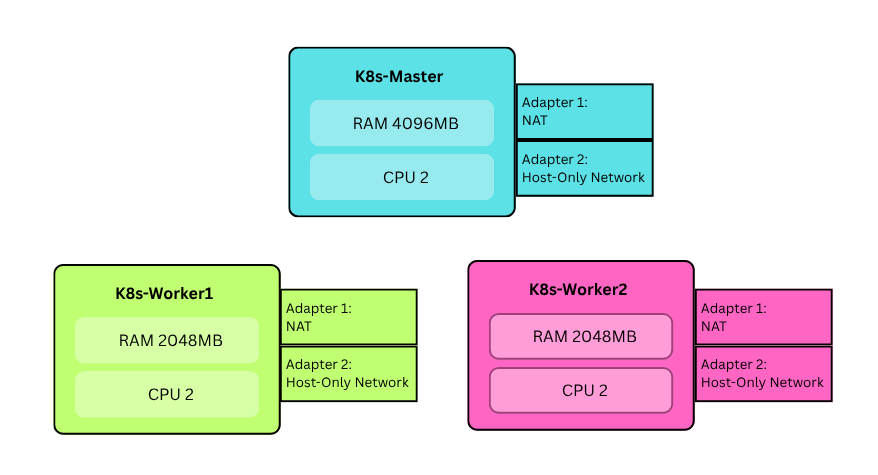
Note that Adapter 1 is used to ssh into VMs and Adapter 2 is used for kubernates cluster
Step 1: Provision Infrastructure
Create Virtual Machines
Create 3 Virtual Machines with above system specifications. Attach each VM’s adapter 1 into NAT and Adapter 2 into Internal network.
VM Configuration
Do the following configurations to all three VMs.
Configure static IP addresses for the adapter 2
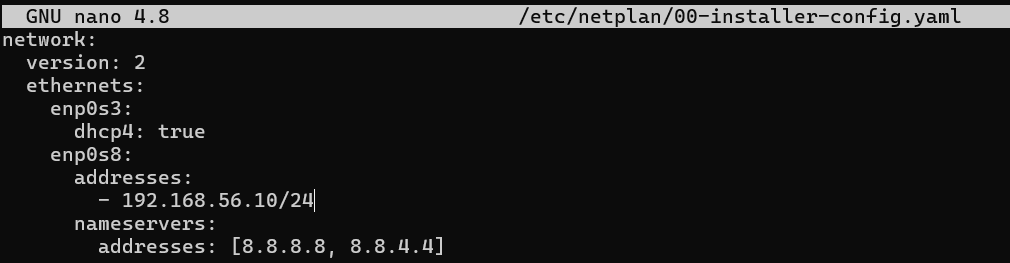
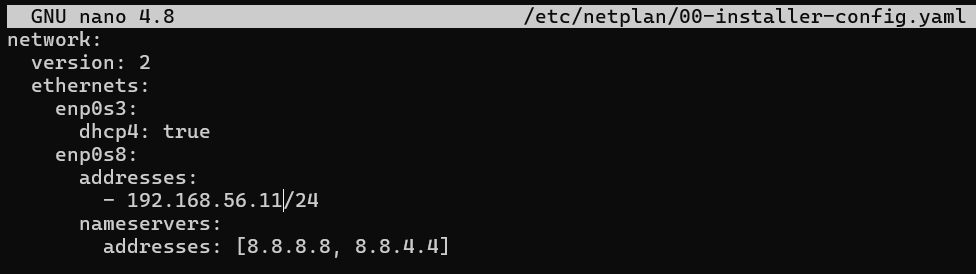
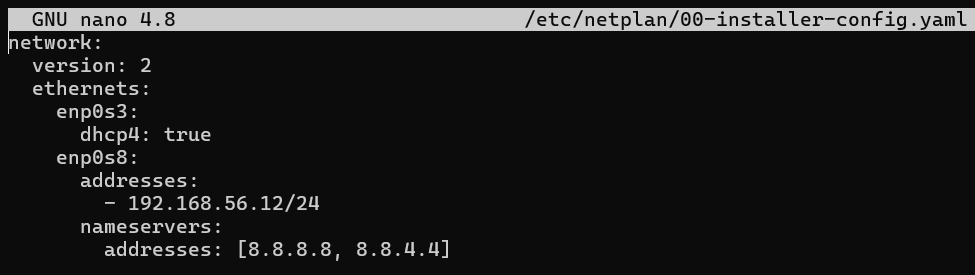
Apply the
netplansudo netplan applyConfigure the
/etc/hostsfile to map our hostnames (k8s-master,k8s-worker1, etc.) with respective IP adresses manually.sudo nano /etc/hosts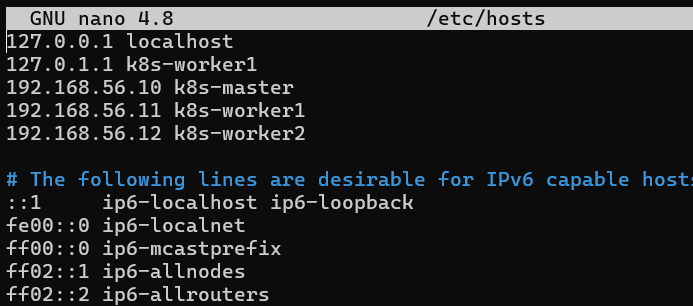
Install packages that are required to add the kubernated APT repository.
sudo sudo apt install -y apt-transport-https ca-certificates curl gpgTurn the swap off to prevent kubelet service from failing or behaving unpredictably.
sudo swapoff -a
sudo sed -i '/ swap / s/^\(.*\)$/#\1/g' /etc/fstab
Load kernel modules that are required to ensure Kubernetes networking works correctly.
cat <<EOF | sudo tee /etc/modules-load.d/k8s.conf
overlay
br_netfilter
EOF
sudo modprobe overlay
sudo modprobe br_netfilter
Set following kernal parameters required for kubernates networking.
cat <<EOF | sudo tee /etc/sysctl.d/k8s.conf
net.bridge.bridge-nf-call-iptables  = 1
net.bridge.bridge-nf-call-ip6tables = 1
net.ipv4.ip_forward                 = 1
EOF

sudo sysctl --system
Step 2: Install Container Runtime
Install containerd on all VMs
Add Docker repository to ensure you install the latest version.
sudo apt-get update
sudo apt-get install ca-certificates curl gnupg lsb-release -y

sudo mkdir -m 0755 -p /etc/apt/keyrings
curl -fsSL https://download.docker.com/linux/ubuntu/gpg | sudo gpg --dearmor -o /etc/apt/keyrings/docker.gpg

echo "deb [arch=$(dpkg --print-architecture) signed-by=/etc/apt/keyrings/docker.gpg] https://download.docker.com/linux/ubuntu $(lsb_release -cs) stable" | sudo tee /etc/apt/sources.list.d/docker.list > /dev/null
Install containerd
sudo apt-get update
sudo apt-get install containerd.io -y
Configure containerd
sudo mkdir -p /etc/containerd
containerd config default | sudo tee /etc/containerd/config.toml
Enable SystemdCgroup
sudo sed -i 's/SystemdCgroup \= false/SystemdCgroup \= true/g' /etc/containerd/config.tomlRestart containerd
sudo systemctl restart containerd
sudo systemctl enable containerd
Step 3: Install Kubernetes Tools
On all nodes:
Add the Kubernetes apt repository GPG key
sudo apt-get update
sudo mkdir -p -m 755 /etc/apt/keyrings
curl -fsSL https://pkgs.k8s.io/core:/stable:/v1.33/deb/Release.key | sudo gpg -- dearmor -o /etc/apt/keyrings/kubernetes-apt-keyring . gpg
echo 'deb [signed-by=/etc/apt/keyrings/kubernetes-apt-keyring.gpg] https://pkgs.k8s.io/core:/stable:/v1.28/deb/ /' | sudo tee /etc/apt/sources.list.d/kubernetes.list
Install kubelet, kubeadm and kubectl
sudo apt-get update
sudo apt-get install -y kubelet kubeadm kubectl
sudo apt-mark hold kubelet kubeadm kubectl
Enable kubelet
sudo systemctl enable kubelet
Step 4: Initialize First Control Pane Node
On the Master node (ks8-master VM), Do the following configurations.
Initialize the cluster
sudo kubeadm init
-- control-plane-endpoint=k8s-master: 6443
-- pod-network-cidr=10.244.0.0/16
-- upload-certs -- v=5
You’ll see an output like following.

Important: Save the
kubeadm joincommand that appears at the end of the above output to join worker nodes to the cluster.Configure kubectl for your user
mkdir -p $HOME/.kube
sudo cp -i /etc/kubernetes/admin.conf $HOME/.kube/config
sudo chown $(id -u):$(id -g) $HOME/.kube/config
Step 6: Join Worker Nodes
On each worker node,
Run the
kubeadm joincommand we saved earlier:sudo kubeadm join <CONTROL_PLANE_IP>:6443 --token <TOKEN> \ --discovery-token-ca-cert-hash sha256:<HASH>You’ll see an output simillar to this if the join is succesful.
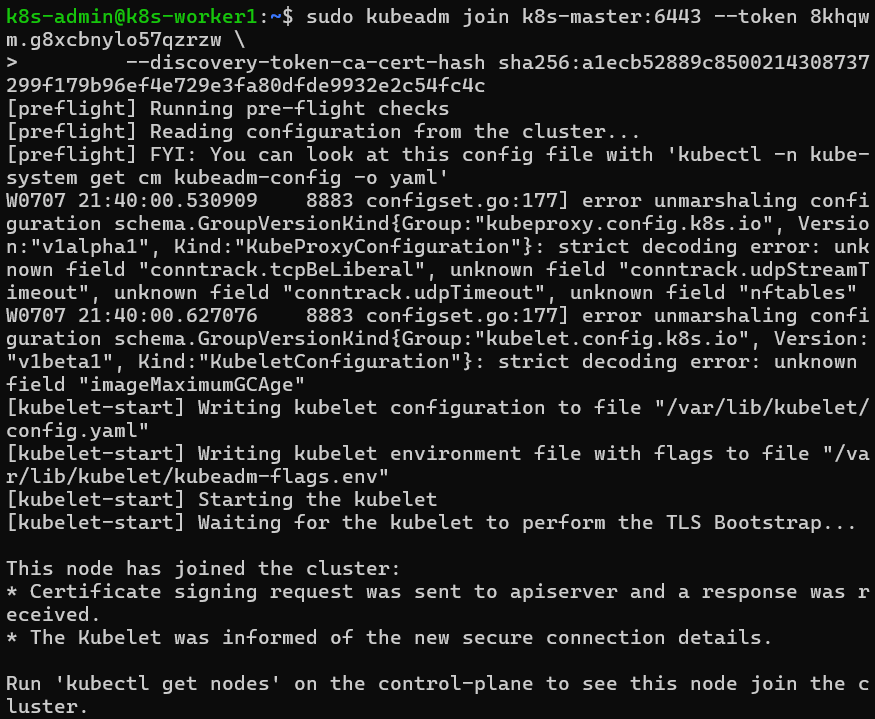
If more control nodes are needed, provision and join them to the cluster via the join command outputted by the kubectl init.
kubeadm join k8s-master:6443
--token <TOKEN>
--discovery-token-ca-cert-hash sha256:<HASH>
--control-plane
--certificate-key <KEY>
Step 7: Validate Cluster Health
On the control plane node:,
Initially, since there is no network plugin installed, you should see the nodes as not ready.

Install a network plugin like calico/flannel. Since calico is error prone in VirtualBox, Flannel is recommended.
kubectl apply -f https://github.com/flannel-io/flannel/releases/latest/download/kube-flannel.ymlVerify node status after the flannel installation.

Check details of nodes

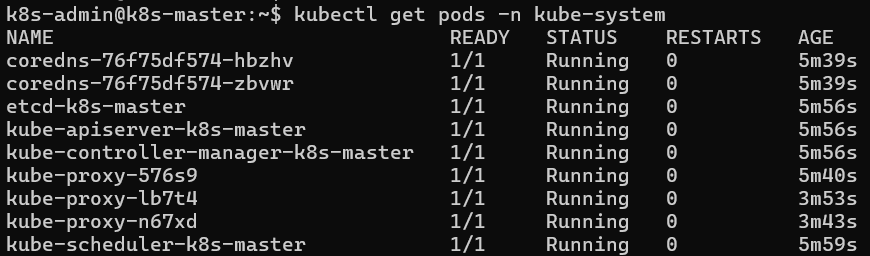
Verify creation of kube-system pods
Step 8: Test Your Cluster
Deploy test pod in your cluster:
kubectl run test-pod -- image=nginx
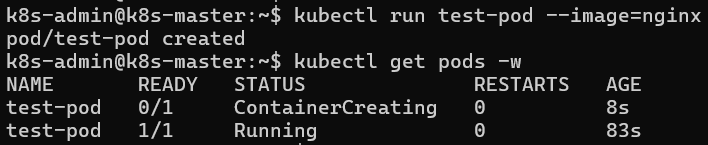
Verify in which node the test pod is created and running
kubectl get pods -o wide

Conclusion
Congratulations!, You now have a fully functional 3-node Kubernetes cluster running on VirtualBox. Feel free to join more control or worker nodes to this cluster if you need!
Have questions about this setup? Feel free to reach out through my social media links or leave a comment below!